Showing posts with label crafty nails. Show all posts

Saturday, January 18, 2014

#nailartjan-Day 16- Gradient

 (Nature is stared because I did do it, but I didn't like how it came out so I did not post it)

Hey guys! Hope you all doing well! We are now halfway through the challenge! I think I might actually finish this one, and that makes me so happy!
So, as I said above, I did not post day 13 (Nature) because I did not like it. I wanted to do a moon over two fingers, and tree shadow on the rest but that did not happen. It ended up looking so messy, and it just wasn't what I had hoped for. 

This gradient mani wasn't what I was hoping for either, but it turned out way better then my nature one. I wanted to do a water marble on my nails but that was a fail, so I opted for just a sponge to achieve a  watercolors effect. I wanted my nail to look like pretty ocean water. Do you think I achieved that? I will deffinately be doing this with different colors at a later time. I was thinking maybe in the summer I could use all neons or pastels! But we shall see.

Accent nail: Revlon-Urban, Sally Hansen- Jaded, and Sinful Colors- Aquamarine. I have Sinful Colors- Snow me White as a base for the accent nail.
The rest of the nails are two coats of Sinful Colors- Aquamarine,

Up close! I swear I don't have polish on my edges, its the light reflecting on my cuticle oil.

If you'd like to see a tutorial for how I did this, please let me know!

-<33


Thursday, September 19, 2013

Mini Series: Halloween Nails- Eyeballs

These would be perfect as an accent nail, don't ya think?
And hey, if blue is not your color, go ahead an use whatever color please you! There are going on YOUR nails after all. :)

Today, I will show you draw these super easy eyeball nails! This, in my opinion, are a Halloween staple. I hope ya'll enjoy the tutorial, and remember if you have any questions please let me know!
  • white nail polish (Sinful Colors- Snow Me White)
  • blue nail polish (Sinful Colors- Aquamarine)
  • red nail polidh (Mary Kay-Coral Stone)
  • black nail polish (Wet'n'Wild- Black Creme)
  • small nail art brush
  • clear nail polish (Wet'n'Wild- Clear)


Paint your nail white.

With the nail polish brush (or your nail brush) make a blue circle in the middle of you nail. 
I used the nail polish brush, and sadly it came out wonky but I think it adds to the creepiness.
With your nail polish brush, add a circle to the middle of the blue.
I put mine a bit off center so it would seem as the eye was looking away.


Now, using your nail art brush, make small red veins coming from the edges.
These are simple, draw them anywhere you want.

To finish it off, add a small white dot to the black and blue. This is to give it more depth, and it makes it look more like an eyeball when it is reflecting light.

Apply a top coat and you are done!

As for the rest of the nails, I left mines white. You could draw this on all of them but I liked it more as just an accent. Also, if you want to add a bit more creepiness to this, you could use red food coloring or red lipstick around your nail to make it seem like bloody. :)


Don't forget to send me pictures if you do try this or tag me on instagram! (SunshinesImaginarium)
Until next time!


Sunday, September 15, 2013

Mini Series: Halloween Nails- Mrs. Frankestein

Hello guys!
Sorry I have been absent after a week of regular posting...I have been coming up with ideas for this mini sereies HALLOWEEN NAILS!
Unfortunately, there won't be many Halloween DIY's..but I hope the nail tutorials will keep you satisfied :)
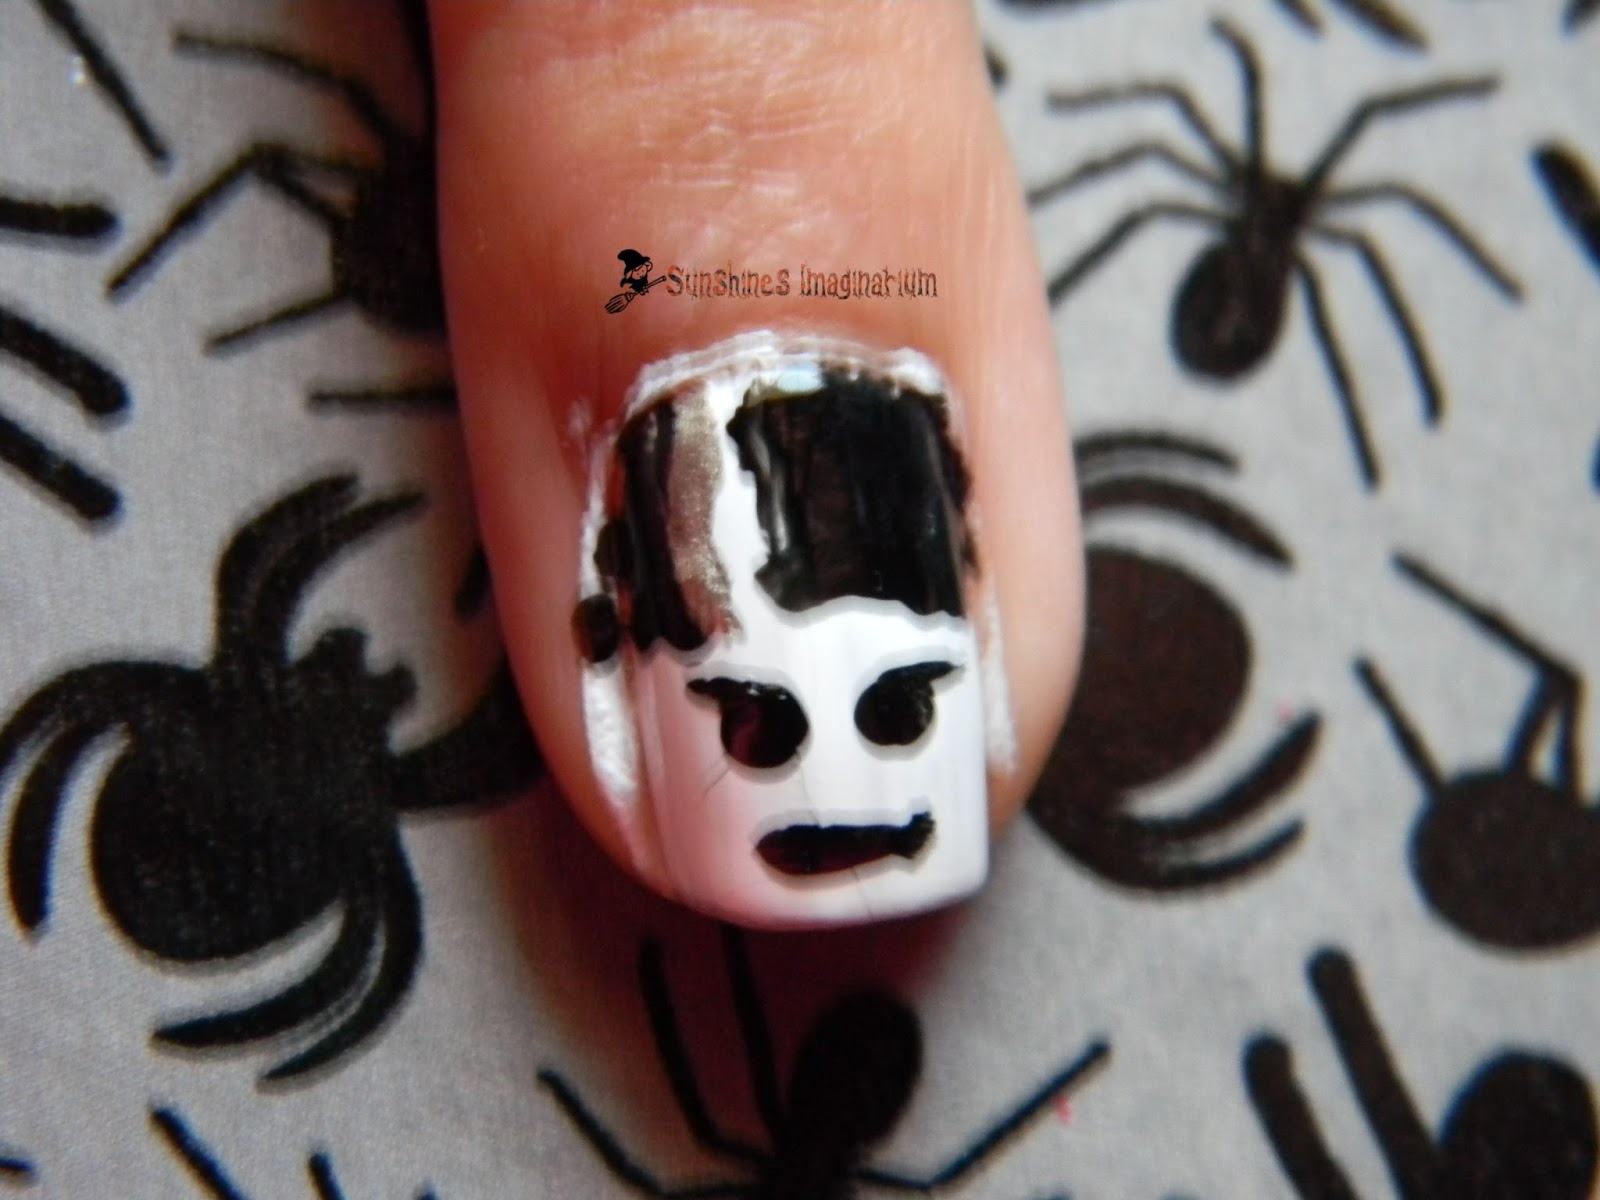
To kick things off, I will be sharing how to create Mrs. Frankenstein. 


Isn't she cute? :)
(And yes I know shes supposed to be green, but I saw this one on google images and I liked how it looked)


  • White polish (Sinful Colors-Snow Me White)
  • Red polish (Mary Kay-Coral Stone)
  • Black polish (NYC Black Cream)
  • Silver polish (Milani-Ms Milani)
  • Topcoat 
  • Small nail brush


After pitting on your clear base, paint your nail white.

 With your brush, draw hair leaving a small gap in between.

 Add a small stripe of silver.

 With the bottom of the brush (or a dotting tool) add two dots for the eyes.

Again with your brush, draw two lines above the dots you just made, and a long one bellow for the mouth.

 To finish, add two red lines for cheeks, and your topcoat. Clean around your nail and you are done!


As for the rest of the nails, you can paint them with the silver, or a green. It's all up to you.
Remember to not let the polish dry on the brush, and to clean it every time you are changing color.


Hope you guys enjoy this, and I will be back with a nother one soon :)
If there is any nail or DIY tutorial you'd like to see, please let me know!