Showing posts with label Halloween diy. Show all posts

Thursday, October 24, 2013

Mini Series: Halloween Nails- Spider & Spiderweb

Today was an exciting day! I received nail mail WOHOOO!! Who doesn't love getting nail polishes?! I think we can all agree its a good feeling, specially when they're something you haven't tried before.
My nail mail consisted of a DEL SOL nail polish, Maybelline Color Show Holographic, and Sally Hansens Magnetic. Pretty awesome right?!
I couldn't wait to try one, so I used the Maybelline Color Show Holographic for todays nail tutorial.

Here is the polish before the spider and spiderweb:
(This is with two coat on.)
Isn't it just too pretty?!?! The color was hard to capture on camera, but this is somewhat close. The color is named BLUE BLAZE. It almost looks like a very silvery grey, but its more like a super silver color with hints of blue. (Does that make sense, HAhA)


On to the tutorial:


  • Clear nail polish (Sinful Colors- Clear Coat-1064)
  •  Holographic nail polish (Maybelline Color Show Holographic-Blue Blaze-05)
  • Black nail polish (Wet n Wild- Black Creme-424A)
  • White nail polish (Sinful Colors- Snow Me White-#1)
  • nail rhinestones
  • small nail brush


P.S: You should definitely check out these 5 nail Instagram accounts!

(In no order!)

1. NailsByNef (She has swatches for a lot of polishes I didn't know about, specially DEL SOL. She also sells polishes that are sometimes hard to find for a discounted price! )

2. AsToldByAnnalisa (Has really long pretty nails, lol, which she uses to post beautiful swatches and nail designs)

3.TrendyPolish (Swatches to a lot of indie polishes, and awesome nail designs)

4.DoneByDes (Another account with awesome nail designs, and very pretty nail swatches)

5. TheNailSquad (Full of swatches! I seriously want to buy ALL the polishes they post haha!)

P.P.S: Don't forget to enter the giveaway in the precious post!!


Until next time! 


Tuesday, October 22, 2013

Mini Series: Halloween Nails- Simple Pumpkin (Glow in the Dark) + Giveaway!

Hi guys!
Long time no see! You can blame midterm for that. Haha. I've had to study so much...my brain has hurting! But I am finally done with them. I can finally breath again! Yay!

So today I bring you this super easy pumpkin design. Anyone can do it, seriously. I wanted something that would still scream Halloween, but be super simple that anyone could draw it. It only take about two minutes too, easy right? And guess what?! IT GLOWS IN THE DARK! Cool right!?! Haha. I am going to have to try and capture that awesomeness!! HAHA!

  • Black Nail Polish (Wet n Wild- Black Creme 424A)
  • Orange Nail Polish (Santee- Beach Yellow M57A)
  • Glow in the Dark (Rubies Glow in the Dark)
  • Small brush
  • Top coat (Sinful Colors-Clear)


Hope you enjoyed this video, and if you try it be sure to send me some pictures or tag me in them on Instagram, or upload them to facebook!

-------------------------------------------------------------

Before I leave (lol) I wanted to let you guys of this little giveaway I am doing for you!
This time I am using Rafflecopter, so it will be much more organized, and 
you have a change to earn multiple entries this time too. :)
Alsoooo, check out instagram for another chance to gain and entry!

Prize:
 Any 2 bows that are stocked in my shop
3 small nail glitter jars
4 samples of Halloween nail glitters
5 samples of flocking powder (to make your nails fuzzy)
1 Baggie of black microbeads
sample of heart nail glitters
ANDDDD, a SURPRISE gift :)


a Rafflecopter giveaway

Thursday, October 17, 2013

DIY-Sticker Earrings


Hi guys! 
So today I bring you a quick video showing you how to make earrings out of stickers!
These are super easy to make, and they only take about a minute a pair. I thought this was cute, specially for the holidays. :)


  • Stickers, make sure they are the puffy ones
  • earring backs
  • brush or your finger
  • white  school glue
  • optional: hot glue gun with glue, or E600


Hope you have enjoyed this, and please let me know if you give this a try!
Also, let me know if there are any videos you'd like to see from see, and how did I do with the editing. 
Don't forget to follow me on Instagram, I will be having a giveaway soon! :)

-Until next time <3

Saturday, October 12, 2013

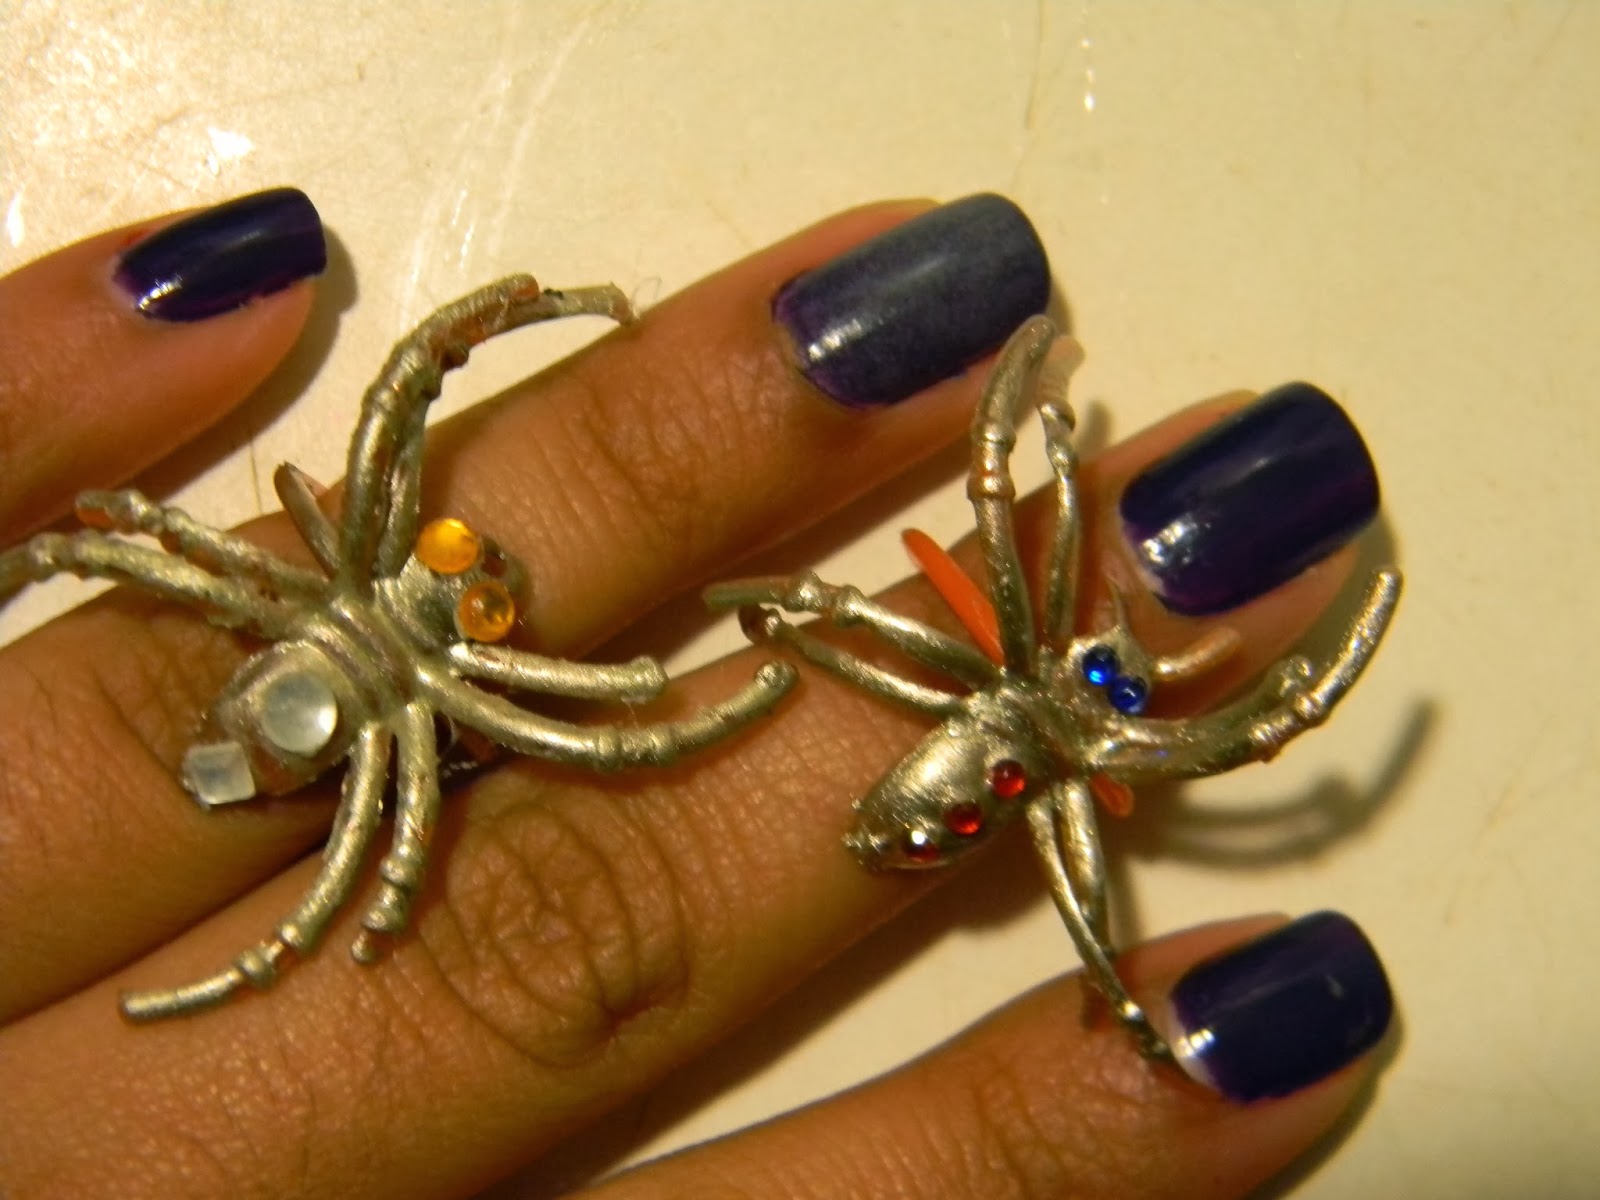
DIY- Spider Rings!

 Hi guys!
Today I bring you a cute DIY that I thought would be perfect for Halloween. :)

     If any of you follow me on Instagram, you'll know that I am doing @Savannahsdiys Halloween October challenge. Well yesterdays, it was to make a spider out of pine comes. Well, there was no around me (booo!!!). I still wanted to do something with the spider theme, so I said why not a pretty gold and jeweled glow in the dark ring! 
     I headed into my local dollar three and lo and behold-I found a variety pack with bath, skull, and spider rings! Oh, my mind is just buzzing with ideas!
     Anyways, read down below to read how I achieved this. :)


  • spider ring
  • nail polish, or acrylic paint (I used nail polish, Santee in Rich Gold #M71A)
  • rhinestones
  • glow in the dark polish, or acrylic paint ( I used nail polish, Sinful Colors in Glow in the Dark #1353)

  1. Paint your ring your desired color. Adding two coats if needed.
  2. While the polish is still wet, add your rhinestones.
  3. Allow your base coat to dry.
  4. Paint with glow in the dark paint, and allow to dry.
Viola, you are done!


Wasn't that easy? Haha!

I hope you have fun making these!
And please, if you do, send me pictures to (Precious.Desert.Rose@Gmail.com) or tag me on Instaram (SunshinesImaginarium).

Until next time!